Ellie & Elizabeth

A lady chats about hope, her house and the crazy crew that lives there

  • Home
  • Visit Our House
  • Recipes
  • Decorating/DIY
  • Revelations
  • About
  • SUBSCRIBE

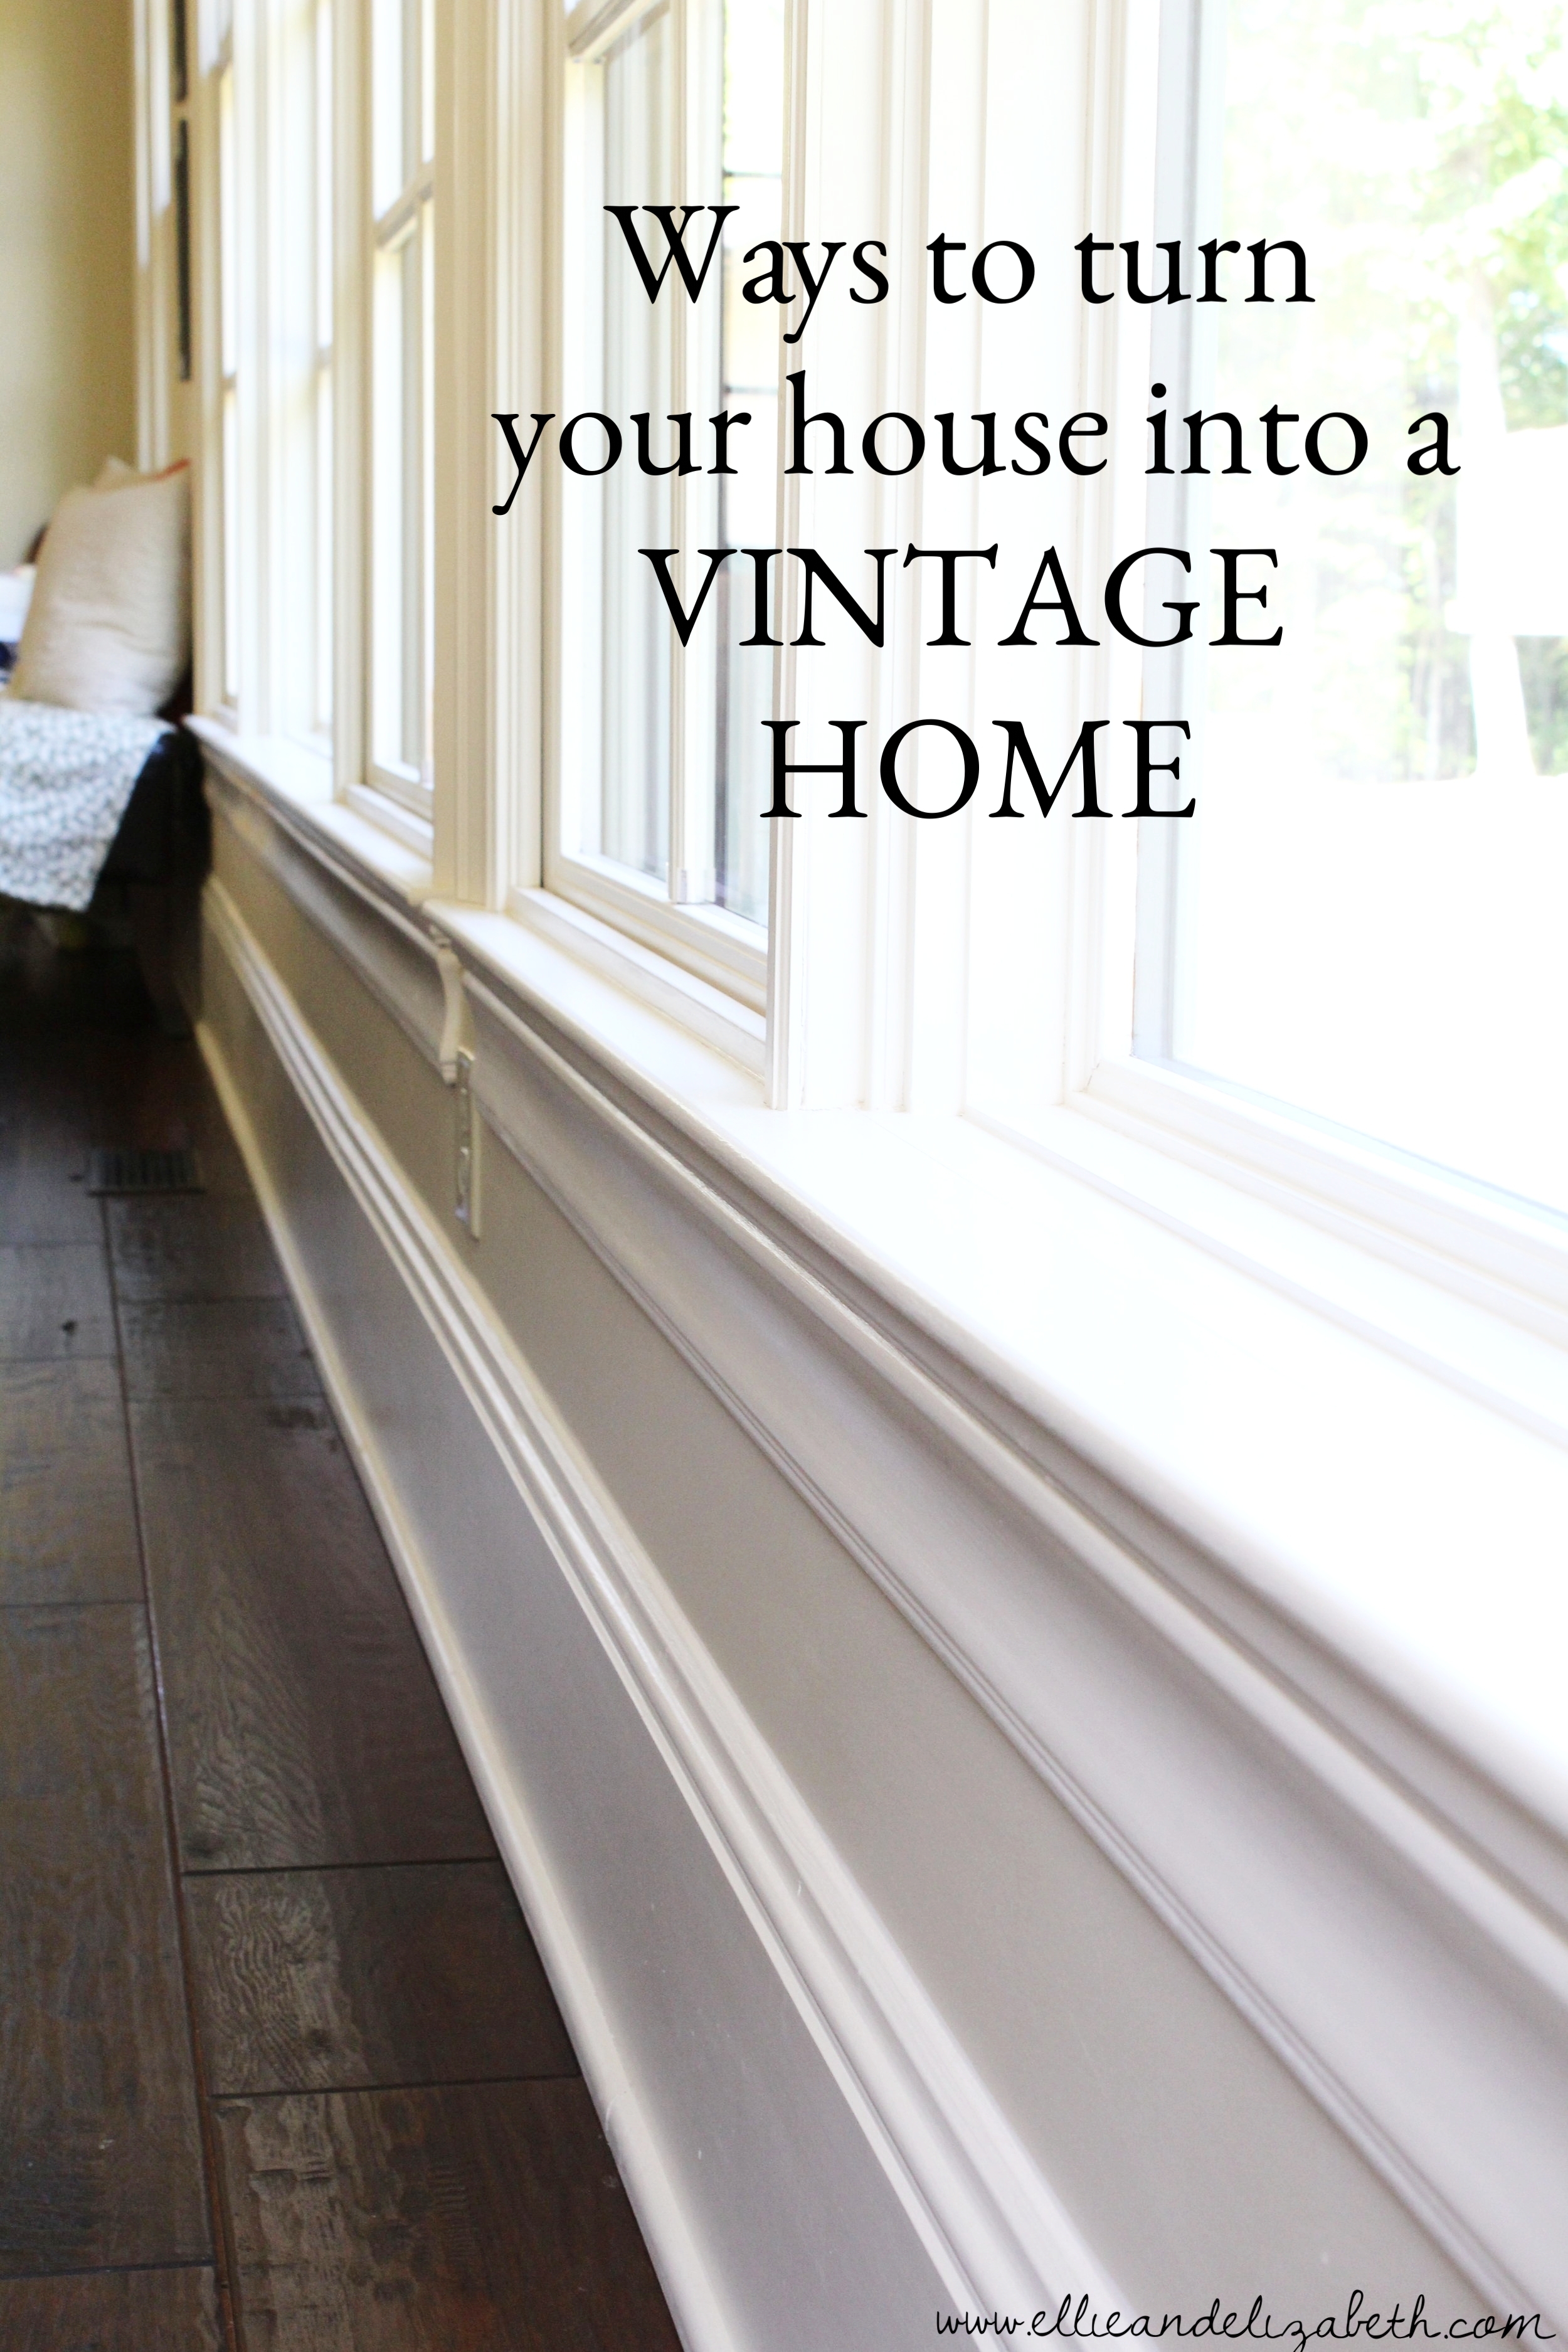
Ways to turn your house into a vintage home Part 3

September 25, 2016 by Elizabeth in decorating

This is the last of the three part series. Here are Part One and Part Two, if you missed them.

DOORS

MY FAVORITE THING! I had no idea I loved doors so much until we built the house.

I admit it is a weird obsession but it started when I discovered arched doors. Houzz.com is the best and worst website when you are working on your house. Great for ideas but there are so many possibilities, it makes you a little crazy. And the budget says 'No, we do not need to import carved, arched wooden doors from another country' (Or was is Hubby that said that?). Doesn't anyone understand the need for antique arched doors with beautiful hand-carvings from India?? 

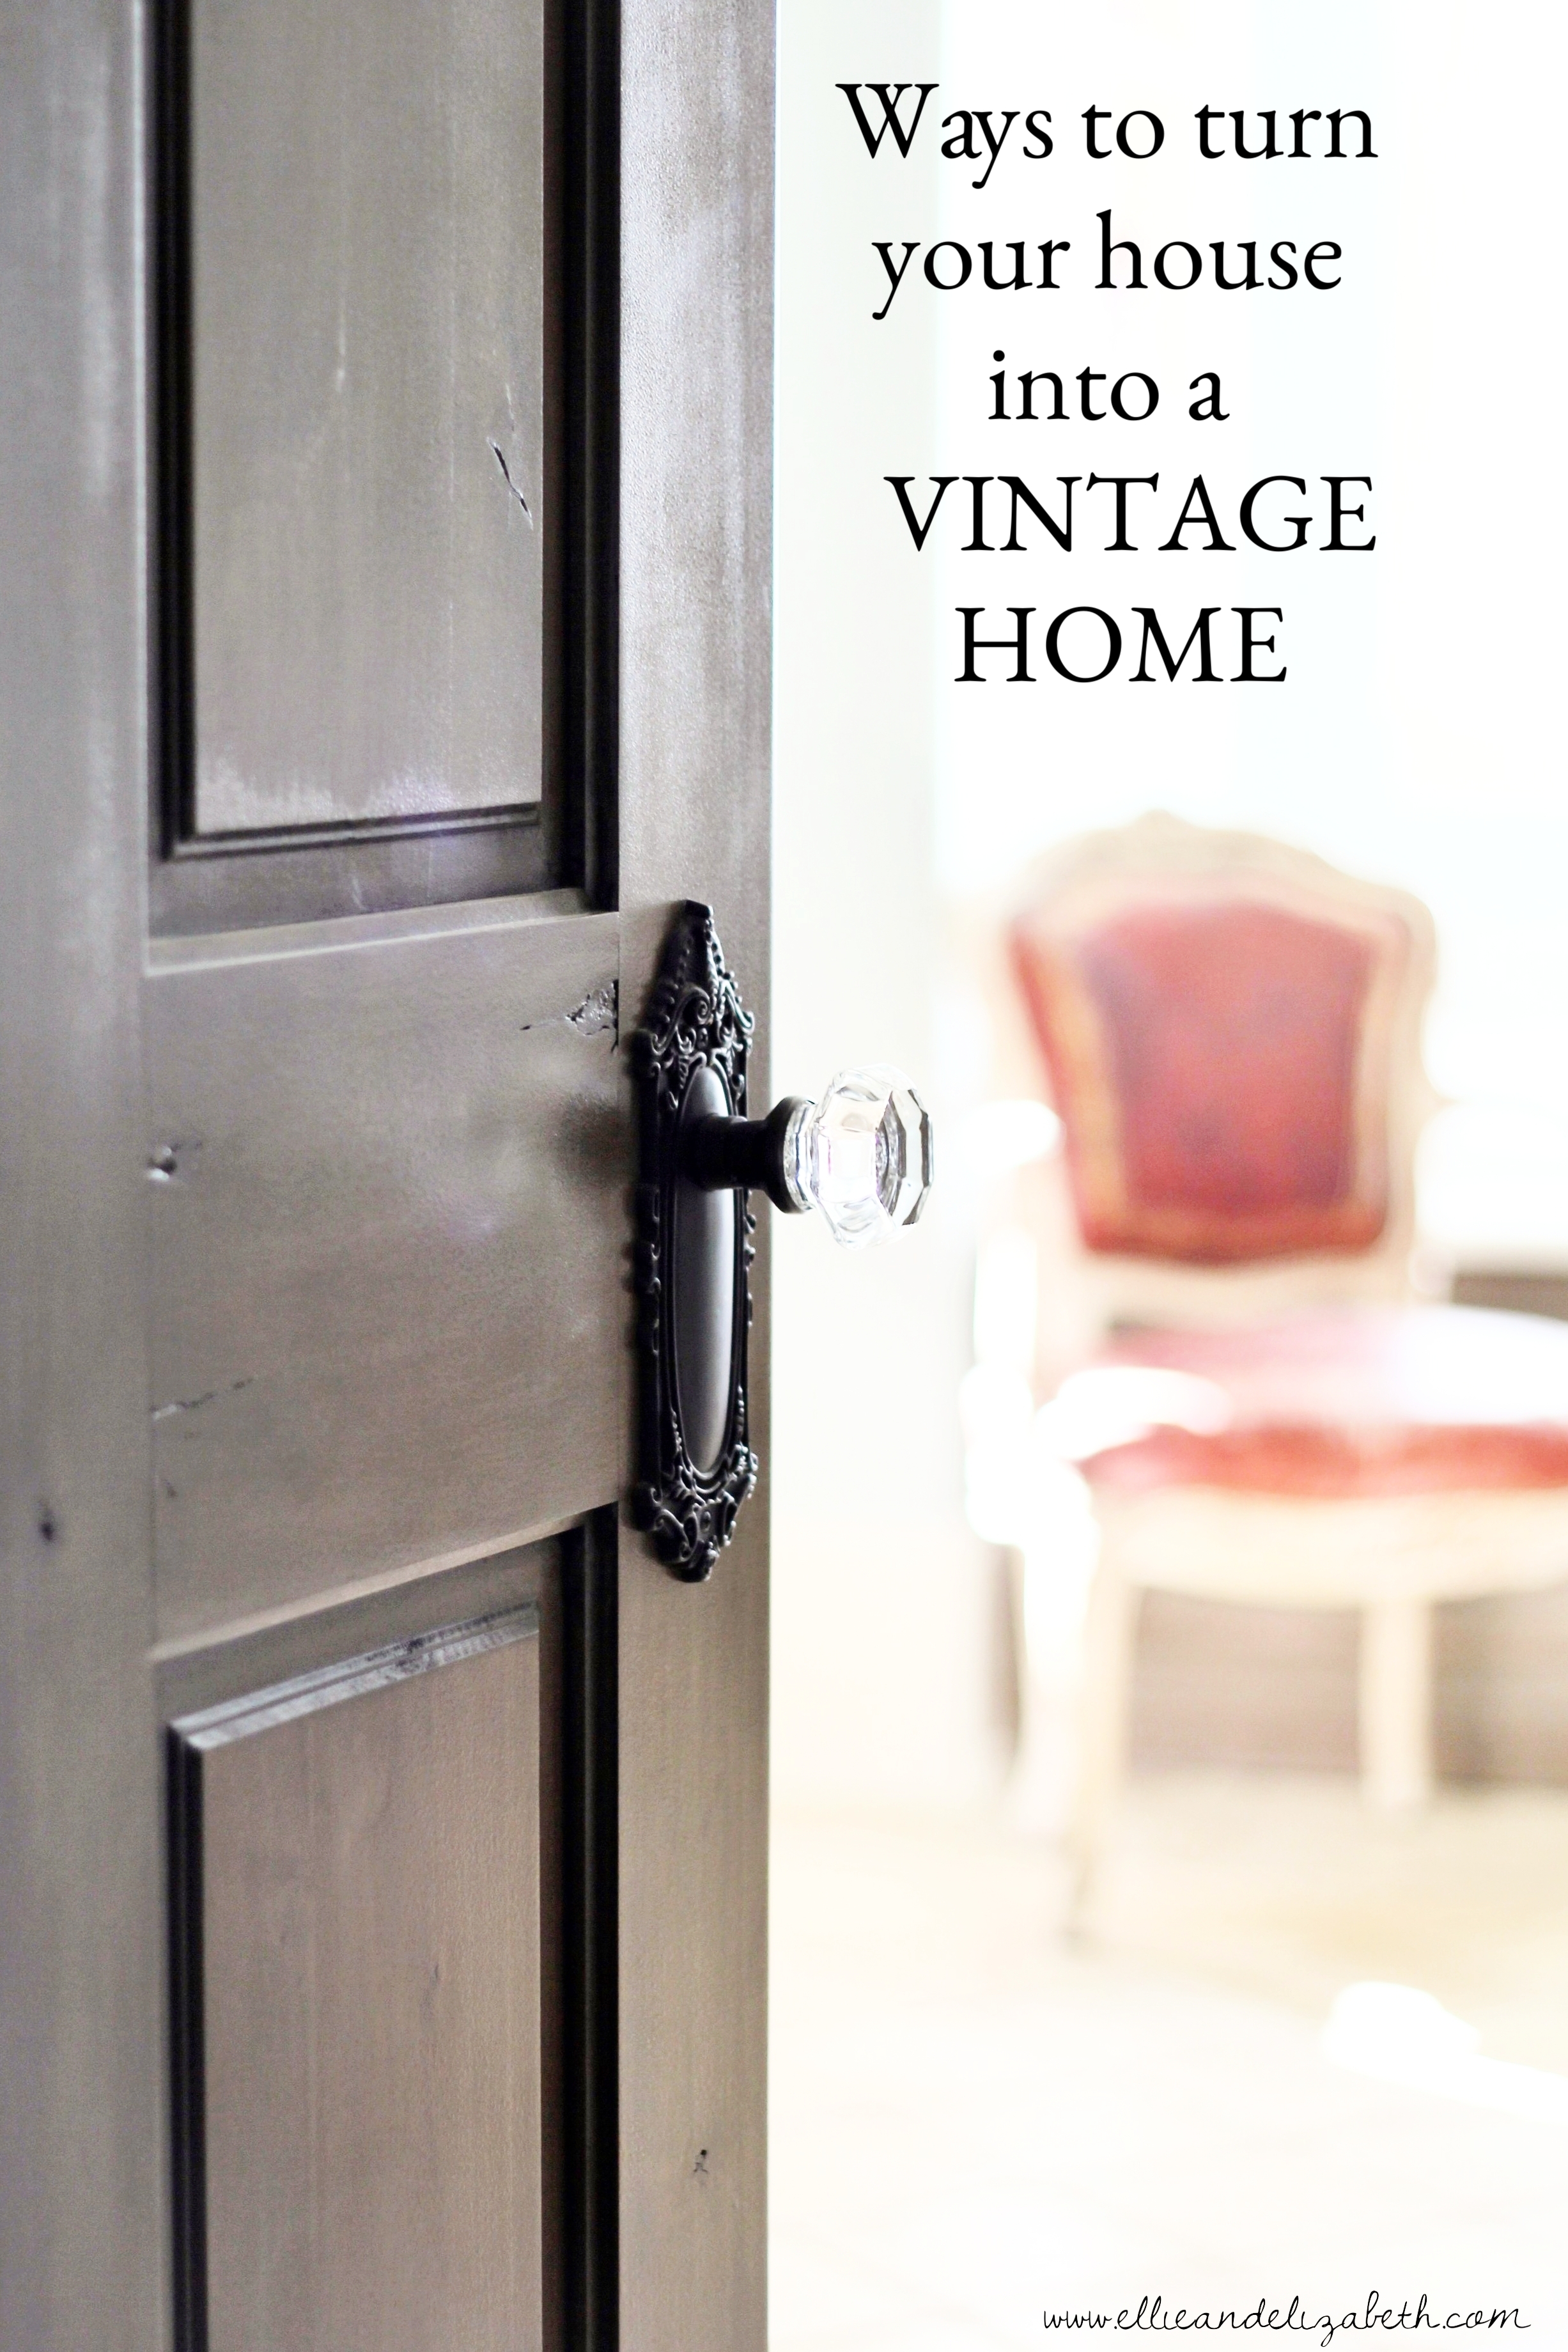
So I put the doors from India aside since no one wanted to sell them to me for pennies. Later at an antique store, we found some neat 120 year old doors that used to be the front doors of someone's house, and made them into our pantry doors by putting them on sliders:

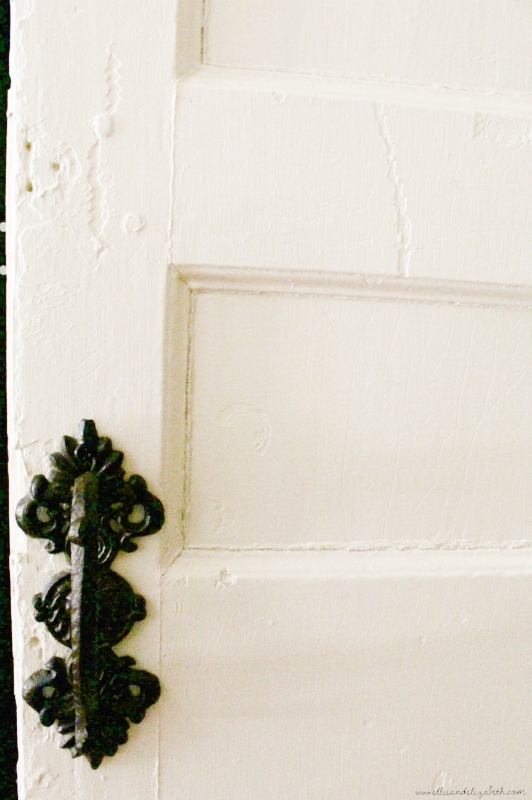
These doors may be too shabby for some people, but I really like them. Some of my relatives are mystified why I would want grubby, ancient doors in my house. As you can see, they are really beat up. I'm going to do a post soon on how my hubby got these ready to hang. These doors cost no more than it would have to get plain doors, so I think it's a neat way to add character without adding cost on to what I would've spent anyway. The sliders do add to the cost, but I wanted to do sliders regardless if we used antique doors or not.

I found another antique door online, this one a little bit of a splurge but we decided to go for it and use it for the basement door. By the time our builder stripped off some chipping veneer and worked on it's quirks, he said he could've just built us a door just like it for the same or less money.

Oopsie.

Um, yeah, but it's vintage and besides, it came with an old door handle...so it makes it totally worth it. Hubby really loves me, or he's secretly planning my demise, because he never said a word. I really love that guy, so I'm going with he loves me too.

ANTIQUE RUGS

A few pieces of antique furniture mixed with new pieces helps gives a house a vintage character, but my favorite, along with the doors, is an antique rug. I have a thing for turkish rugs right now and Etsy has some cute ones. The larger ones are pretty expensive but you can get a 2x3 fairly inexpensively for a bath or kitchen and really add some character to your home because they are so unique. 

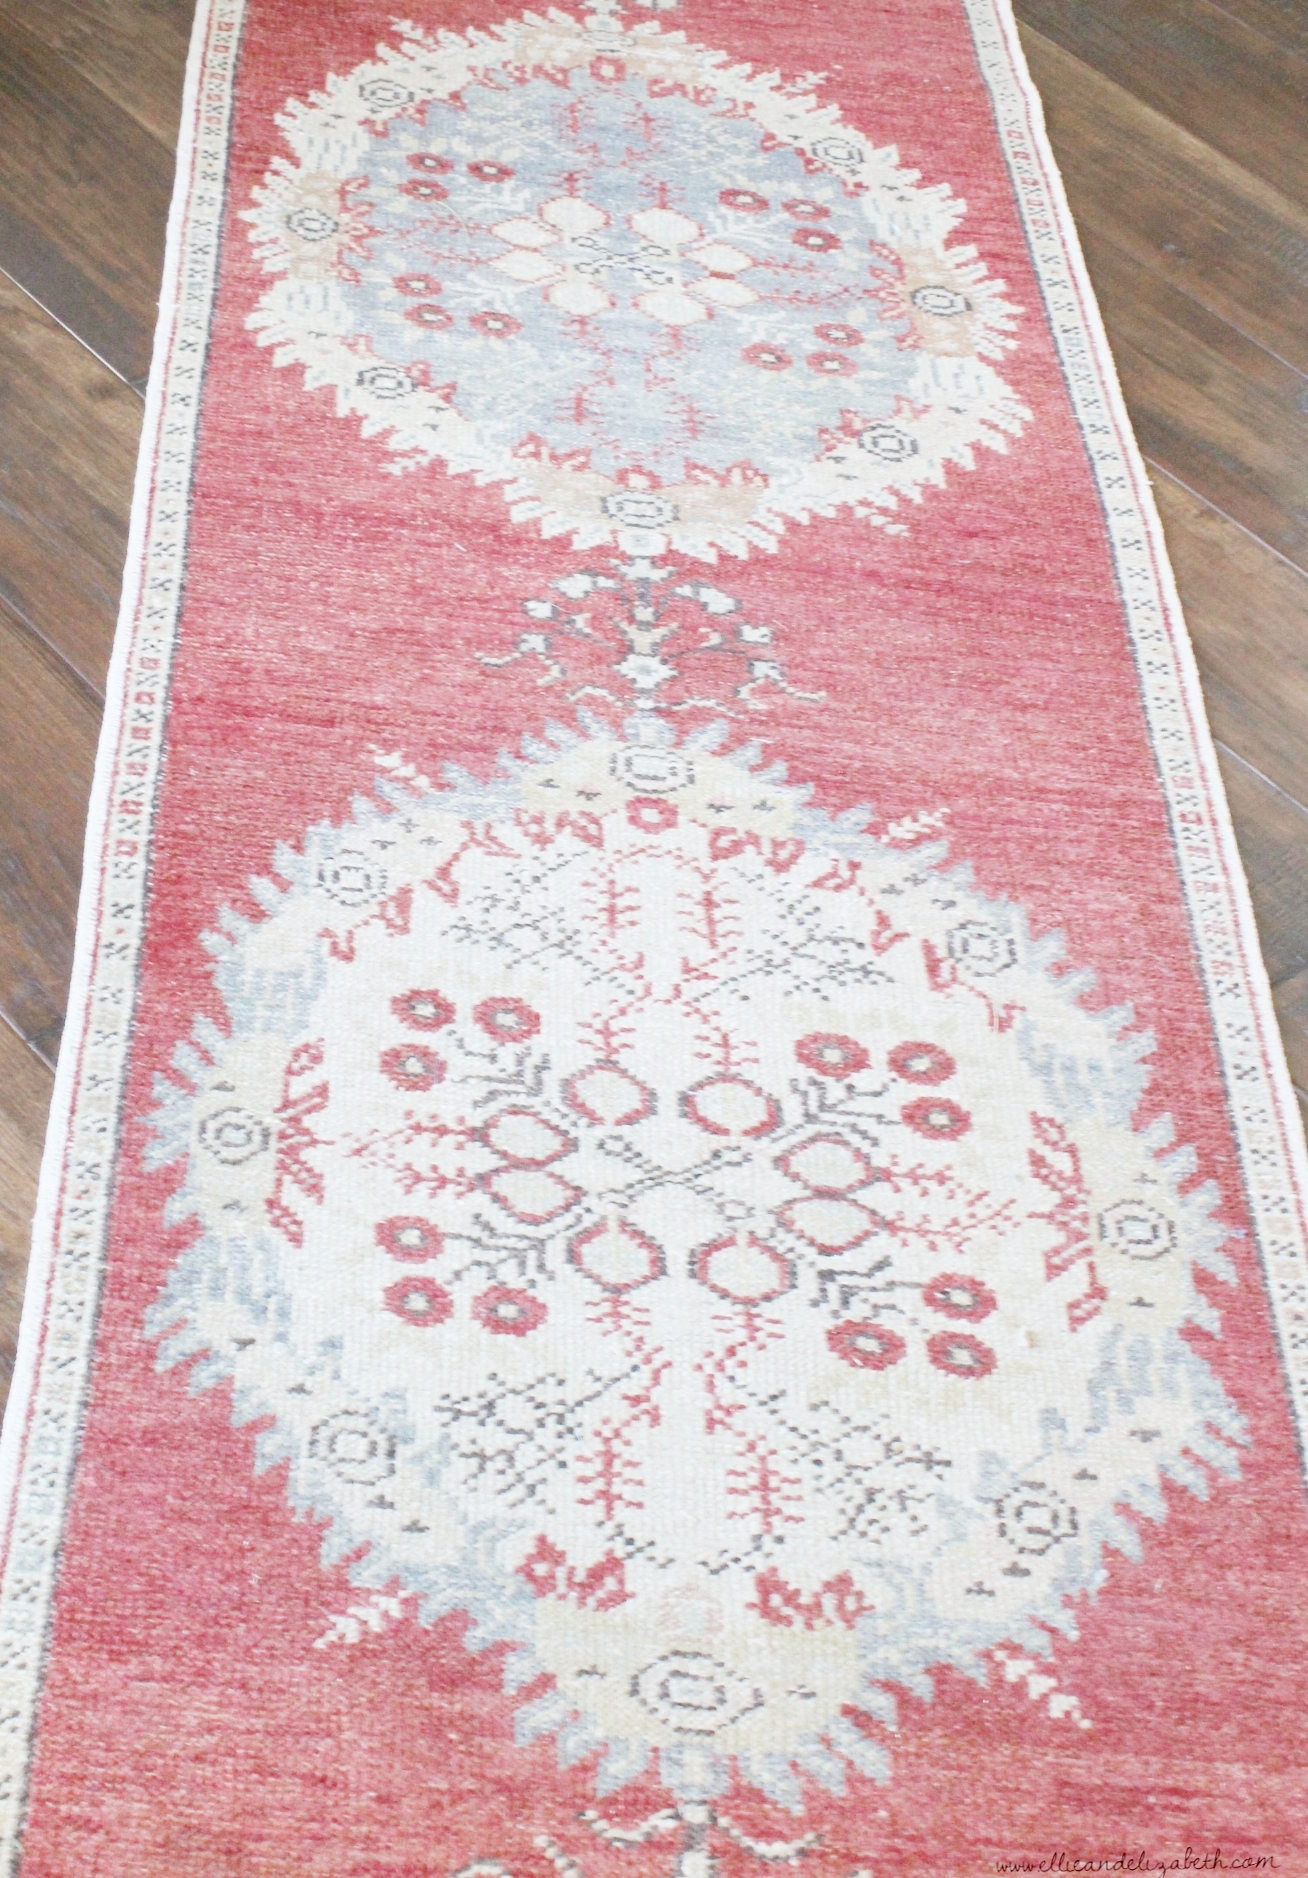
My grandmother gave me a few of her oriental rugs. They are red, which wouldn't normally be my first choice for color scheme, but I love that they are worn and frayed around the edges. There's something about having something passed down with a family story that makes them special.

That's the last of the vintage home series. I'm moving on to some fall decor soon. Bring on the pumpkins! Thanks for reading!

Love, 

Elizabeth

Sometimes I think Elizabeth's Hubby could use a nice vacation. At a contemporary resort. With no vintage doors.

Sometimes I think Elizabeth's Hubby could use a nice vacation. At a contemporary resort. With no vintage doors.

September 25, 2016 /Elizabeth
ways to turn your house into a vintage home, vintage decor, vintage rugs, vintage home, old doors, doors on sliders, pantry doors, rounded doors, historic doors, old rugs, turkish rugs, etsy, hobby lobby doorknobs, french country house, french country blog
decorating
5 Comments

Ways to turn your house into a vintage home Part Two

September 23, 2016 by Elizabeth in decorating

Hey guys, here is Part Two of the three part series, 'Ways to turn your house into a Vintage Home'. If you missed Part One, find it here.

WINDOWS AND MOLDINGS

Love deep window sills! They are a great option if you are building a home and you want to add a vintage feel. Hubby and I didn't even think of this until the last minute and didn't make ours extremely deep, but they are deeper than what we had before and I'm really happy with them.

Nothing says I'm over the hill like 'I'm excited about window sills.'

I love to see windows that have a sill over a foot or more deep. It's so cozy looking, I can just imagine throwing a cushion in there and making it a window seat. Here's one I found online that is a great depth and they actually added a hidden drawer in it! Ingenious! How much stuff could I hide from the Bear in there?? Every time he's grounded from his iPod, (every week) bam!, instant hiding place. 

Picture courtesy of GL Callow Building and Remodeling (www.glcallow.com)

Picture courtesy of GL Callow Building and Remodeling (www.glcallow.com)

Something else I've seen done in houses to add vintage character after they are already built is making the molding above the window substantial. Nowadays the trend is to hang curtains as close to the ceiling as possible. It gives the illusion of a taller ceiling and I love the look, but it does sometimes leave an awkward space between the window molding and the ceiling. KariAnne at www.thistlewoodfarms.com (another Kentucky girl and one of my favorite bloggers!) added pieces of wood and trim at the top of her farmhouse windows and it really changed the whole look. It was only in the $22 range per window and it solved that awkward blank space! See below the after picture and those smocked curtains, LOVE! Click either picture to see a full tutorial on how she applied the trim and wood pieces.

Picture courtesy of www.thistlewoodfarms.com

Picture courtesy of www.thistlewoodfarms.com

Picture courtesy of www.thistlewoodfarms.com. 

Picture courtesy of www.thistlewoodfarms.com. 

The same goes for baseboards. That was another thing we didn't think about until last minute, but I'm so glad that we put tall baseboards in this house, They are about 10". I read there are no true 'rules' but a guide I found suggested that you base the height of your baseboards on the height of your ceiling: 

8 foot tall ceilings: no larger than 5-6" baseboards

8.5 to 9 foot ceilings: 7" baseboards

10- 12 foot ceilings:  8 – 12″ baseboards

Our ceiling here in the master bedroom is ten feet, so the 10" baseboard works well here and in the other parts of the house that have 12 feet ceilings. If I hadn't built and wanted to inexpensively beef up my baseboards in my previous house, I would have left the original baseboard there (it was maybe 4 inches tall), put a thin piece of molding at the height I wanted the new baseboard to be. Then paint the new trim piece, the wall in between the trim and the original baseboard all the same color, so it looks like one big piece of molding. I've seen it done with crown molding too. The eye is really fooled into thinking the painted wall in between is part of the molding. I hope this makes sense. Here is an example I found at www.thehouseofsmiths.com. They used a board to guide where they put the top piece of molding...

Picture courtesy of www.houseofsmiths.com

Picture courtesy of www.houseofsmiths.com

Pic courtesy of www.houseofsmiths.com. Click photo and scroll down to mid-post for full tutorial.

Pic courtesy of www.houseofsmiths.com. Click photo and scroll down to mid-post for full tutorial.

and then painted the new molding and wall in between.  Such a neat trick to creating a chunky baseboard!

Hope you've found some ideas to play around with...the last of the series is coming up and it's my favorite! See you Sunday!

Hugs,

Elizabeth

We all know if we had a hidden secret drawer, Bear would not only know about it, he'd be the one who designed and installed it. There are no secrets from the Bear. He probably already has these in his room, we just don't know about it.

We all know if we had a hidden secret drawer, Bear would not only know about it, he'd be the one who designed and installed it. There are no secrets from the Bear. He probably already has these in his room, we just don't know about it.

September 23, 2016 /Elizabeth
vintage decor, tall baseboards, faux baseboards, make baseboards look taller with paint, chunky molding, tall window molding, inexpensive molding, vintage home, ways to turn your house into a vintage home, antique feel to a home, french country decor
decorating
8 Comments

WAYS TO TURN YOUR HOUSE INTO A VINTAGE HOME

September 21, 2016 by Elizabeth in decorating

This is a three part series on ways to add vintage looks to your home, including inexpensive options for an existing home or the whole shebang when you are building a new house.

There was the greatest house up for auction. I believe I've even mentioned it before.  It was old. I love old. It had heavy brass doorknobs, a stained glass window, a huge stair post and worn, dark wood floors that creaked. A good creak, as in 'I have a story to tell' kind of creak. Sigh.

It was not meant to be. Hubby is afraid of old. I see beauty and character. He sees work, chipping paint, old plumbing, dollar signs; money pit kind of dollar signs. And shoot, he was right, it did need a lot of upkeep. But it was so beautiful...Boooooo.

When we built our house, I really wanted to add in the character that I saw in historic homes. We didn't get to add in as much as I would have liked, character is expensive, but here are some things that we added as we built that I thought would give a house a more vintage feel. Also listed are some things I have seen other people do that are fairly inexpensive alternatives if you are not building a new home and just want to add some character:

DOORKNOBS

Those blasted heavy brass doorknobs started it all. The ones I saw in that house. I never paid attention until then, now I had to find awesome doorknobs! I searched everywhere online and had true vintage hardware all picked out on different sites when I realized that it was too hard to find all the working parts. They'd look great, but you couldn't really turn them or lock the door.  Bummer. I'm sure you can find everything you need if you had the time to search continually, but I didn't have the patience or time to keep looking. Hubby and I found a site, www.houseofantiquehardware.com that made reproductions of historic pieces (I have no affiliation with this site, just an honest review). They had doorknobs, window sashes, hardware, you name it, and it looked really old! There's just something about a doorknob with a backplate or a skeleton key that makes my heart sing.  I know, I have issues. We ended up ordering the glass doorknobs and french handled ones. 

We've been happy with how they look, however, three doors that have the glass knobs won't actually turn the interior parts like they are supposed to, so it's basically for looks, which means I could have gotten the true antique ones, ha!.  I have heard many complaints similar to this regarding many glass knobs, not just from this site, so be careful if you are considering them. If you just need 'dummy' knobs like for closet doors that you don't need to turn, these are awesome.  I've also found some really nice smaller ones at Hobby Lobby if you just need stationary ones. The french handled doorknobs below work perfectly and we have been really happy with them (also from www.houseofantiquehardware.com). 

Pantry doorknob from Hobby Lobby

Pantry doorknob from Hobby Lobby

If you really don't want to replace all your doorknobs, because, really, unless you're building a new house, that's a pretty big deal, I think it's cute to just have a vintage knob for your main bathroom door, a pantry (our pantry door is above), for drawers on a vanity or even use them in unexpected places. I've seen people use them as curtain rod finials, or hung on the wall as a hanger for pictures like this: 

Pic from www.atreelinedstreet.blogspot.com. Click pic for tutorial to go to their site on how to hang knobs directly on the wall.

Pic from www.atreelinedstreet.blogspot.com. Click pic for tutorial to go to their site on how to hang knobs directly on the wall.

How cute is that?

ROD IRON...(COUNTRY VERSION)

WROUGHT IRON (CITY FOLKS) GRATES FOR AIR VENTS or DECORATIVE WALL HANGINGS

I've been very pleased with these grates for our vents! They remind me so much of the ones in my grandmother MomB's house. They also have these at www.houseofantiquehardware.com. There are all sorts of actual antique sizes on Ebay, but I was concerned because many of them showed rust and who knows what. Breathing and air is kind of important, so we went with new.

I think that's a fuzzball at the bottom of the grate. I'm blaming that on Ellie.

I think that's a fuzzball at the bottom of the grate. I'm blaming that on Ellie.

This is also something I think would look good if you just chose one prominent place to put one, if you weren't building a new house and didn't want to replace all your vents. (Like if you had a large floor vent in your family room or other common area.)  If you like the look but don't feel like changing out your floor vents is worth the hassle and expense, I also could picture large reproduction ones hanging on a wall with a wreath on top...like the iron gates, etc. you can find at Hobby Lobby. OR, if you want a super cheap project that looks like this for very little effort, check out these designs hanging on the wall...these are painted rubber door mats! This was posted on www.salvagedior.com. I thought this was such a neat idea, I may try this out in my family room. 

Photo courtesy of www.salvagedior.com. For full tutorial, click the photo.

Photo courtesy of www.salvagedior.com. For full tutorial, click the photo.

They were only $8-$10 each, painted and sanded to look a little distressed. I would've never known they weren't metal grates just by looking at them.

This is all for today, but stay tuned! The remaining part of the series will be posted Friday and Sunday. Thanks for reading!

Hugs,

Elizabeth

Y'all,  I would never leave fuzzballs laying around. You didn't hear it from me, but me thinks Elizabeth doesn't always like to vacuum.Bless her heart.

Y'all,  I would never leave fuzzballs laying around. You didn't hear it from me, but me thinks Elizabeth doesn't always like to vacuum.

Bless her heart.

September 21, 2016 /Elizabeth
ways to turn your house into a vintage home, vintage, historic house, vintage decor, vintage home, give your house a vintage look, adding character to your home, vintage doorknobs, glass doorknobs, french doorknobs, iron floor grates, iron air vents, painted door mats, rubber door mats, distressed decor, hobby lobby doorknobs, historic doorknobs
decorating
12 Comments

Changing an Ugly Picture to a Large Chalkboard

August 26, 2016 by Elizabeth in decorating

When we built our house and moved a year and a half ago, we had blank walls for a long time. We decided to have some people over and I really wanted something, anything, on the walls at this point. I hadn't brought most of our wall decor with us, because the color scheme didn't match, or to be honest, it was about 20+ years old and possibly from my college days. (Do you remember Jeff Foxworthy saying, 'Hey, if that's there on the side of the road after midnight, it's in my living room!') Haha. Okay, I'm exaggerating a little, but you get the drift...(and if we're being honest, occasionally I've seen some cute stuff on the side of the road!).

One thing I did bring with us was a large framed picture.  I didn't like the picture itself but I still liked the frame.  

I was wandering around the house wondering what to do with it when I thought I'd really love to put a big chalkboard in the kitchen area.  I had read somewhere about using chalkboard paint on glass...Hmmm.  So off to Lowe's I went.  I got a can of chalkboard spray paint (read on the label, it will say whether it will stick to glass, some won't). I covered the frame part of the picture with newspaper and painted the glass, spraying on three light coats. Bam!  It worked! I had a large chalkboard!

If you're not into painting, I heard that Hobby Lobby has sheets of chalkboard paper.  I bet that would work too if it's large enough for your frame. Before writing on the board, you have to prime it by taking the side of a piece of chalk and going over the entire board. Erase, then it's ready! If you skip this step, most of the time the words or drawings on your board will not fully erase.  I also learned that using a chalkboard pen became permanent even after I had primed the board.  Ugh. I had to paint the whole thing over, so be warned if you plan to use those, it could be there forever.

It really helps when you have a hubby who can draw on the chalkboard...if it was left to me, there'd be a stickman drawn there. He is so talented, it's has been wonderful to have a place to showcase his drawings in the house.  I just hate to erase any of them. 

He did the above drawing by covering the board with chalk and erasing until he had the image of a moose.

I know! If I tried that it would look like some sort of alien. 

We've had the best time drawing seasonal pictures (he draws, I watch) and letting the kids draw on it occasionally. Occasionally only, because with boys the drawing always end up being embellished with words like, 'poo' or something like that. If you don't have boys, trust me on this one. Boys are obsessed with bathroom words, which do not need to be near the kitchen.

I love to repurpose things, especially for just the cost of spray paint, plus it's one less blank wall! Tell me your repurposing ideas! I need more!

Meanwhile in other news, you guys didn't hear it from me, but I'm pretty sure Elizabeth was seen going through Wendy's drive-thru yesterday.  I don't think that No. 1 combo will fit in the little blue box. Love her heart.

Meanwhile in other news, you guys didn't hear it from me, but I'm pretty sure Elizabeth was seen going through Wendy's drive-thru yesterday.  I don't think that No. 1 combo will fit in the little blue box. Love her heart.

Take care!

Elizabeth

August 26, 2016 /Elizabeth
chalkboard, chalkboard paint, repurpose a picture, painting glass, chalkboard paint on glass, repurposing a picture
decorating
14 Comments
IMG_0723.JPG

Fails - Beyond the Camera Lens

July 02, 2016 by Elizabeth in decorating

Pinterest is meant for inspiration, right?  These beautiful, crisp, staged pictures. I LOVE to look at them and admit, I want the pictures here to show well also.  But if you really know me, ahem, you know behind a well staged picture there is always is a little bit of crazy going on.  

Amongst all the perfection of Pinterest pictures and HGTV shows, I know there's a hot mess somewhere there too. There's got to be something there besides PERFECTION.  Maybe a pile of papers just out of the camera's reach, toys (well, electronics) are scattered, muddy footprints are on the floor, and there are handprints on the glass doors.  At least that's how I imagine it, because when I take pictures here, at least one of those things is in the background.  And then there's just the out and out fails.  Projects that I imagine are just going to turn out so cute and picture worthy, and well...they turn out like this:

Who could know that I didn't make the curtain wide enough or that the rod wouldn't stay put or the folds wouldn't cooperate?  

Dear iron company...not cool of you to put plastic on the iron. I have enough problems.

Dear iron company...not cool of you to put plastic on the iron. I have enough problems.

I mean really, who could know that if you get a new iron you should notice that there's plastic on the front before you turn it on?  

Ok.  Most people would notice that.  I didn't.  It gets really melty, guys.

Also, I thought I knew how to make a slipcover.  I've made one for a whole couch before and it actually turned out ok.  Apparently, if I add piping for the first time, however, this happens:

This wondrous example of my talent all took place in the same room.  It looks awesome...

And to further show you my abilities, I made another slipcover that was supposed to look like this:

 thefrenchprovencialfurniture.com

 thefrenchprovencialfurniture.com

But when I got done with it, it looked like this:

If I squint my eyes really hard, I'm sure it looks just like the inspiration picture.  

If I squint my eyes really hard, I'm sure it looks just like the inspiration picture.  

What is this?  What......is.......this?  A poodle skirt?? Or just a poodle.  I've sewn a big, fluffy poodle.  Fabulous.

I had a friend innocently tell me once that I made her feel really good about her life sometimes.  LOL.  Then I thought, geez, maybe she's right!  I could be an inspiration to a lot of people. God's calling for me is to show everyone, 'Hey, if you mess up that's okay! You'll survive!  Just look at Elizabeth! She's happy!

So this is for you, friend, who is out there having a bad day, thinking you are not good enough, that everyone else's (insert here: life, spouse, children, house, car, situation, etc) is perfect, and that no one fails but you.

Look beyond the camera lens.  Everyone fails.  It's all good.

Look at the poodle slipcover.  

And feel better.

❤️, Elizabeth

I fail to stay as cute during a bath.  I don't want to talk about it.

I fail to stay as cute during a bath.  I don't want to talk about it.

P.S.- Tell me about your fails...Come on, I know I'm not the only one.  

Please, tell me I'm not the only one.

July 02, 2016 /Elizabeth
fails, fail, imperfect, decorating fails
decorating
18 Comments
MomB

MomB's buffet

May 02, 2016 by Elizabeth in decorating

This is MomB, my grandmother.  I know, she was a hottie, right?  We called her MomB because her name was Beatrice and she was way too hip to be 'Granny'.  So, MomB it was.  She was one of the first people in my life who caused this whole house obsession because her home, well, just wow.  It was a huge, two story southern home with a wrap around porch with stone columns nestled in a tiny town surrounded by the enormous mountains of Kentucky.  The town was home to formal southern belles who served their snacks on silver trays and dressed for dinner.  She was something else.  It broke her heart when she had to sell the home due to poor health.   She generously gave several pieces of her furniture to family members, which is how I ended up with the Willett buffet:

The cherry buffet

The cherry buffet

I was reminded that this was a cherry buffet and she couldn't understand people painting furniture, especially cherry.  'As you know, you and I would NEVER paint a CHERRY piece of furniture! HEAVENLY DAY!' (She used that 'Heavenly Day' phrase often, as in OH.MY.GOODNESS!)

Oh dear.  She had a way of including you in her opinion even if in your mind you were thinking, "I would love to paint that cherry buffet!"  But, at the end of the day, you wouldn't DREAM of painting that cherry buffet.

Well, folks, I painted the cherry buffet.  Oh, Heavenly Day. 

And here it is.

the painted cherry buffet

the painted cherry buffet

buffet after
buffet
buffet

I used Annie Sloan chalkpaint in French Linen and then Annie Sloan's soft clear wax.  Once the clear wax dried overnight, I used Annie Sloan's soft dark wax to give an aged look.  This was my first true attempt to chalkpaint and wax furniture. (We won't talk about that other time...)  I was told to use the wax sparingly, that if you wiped your finger over the waxed area before it dried and you could see a finger mark that you had too much.  So that's the method I used.  Wax on, wax off, yep, I felt like the Karate Kid.   Probably the best tip I received was that if the dark wax wasn't quite looking the way you wanted, take a little clear wax and go over it.  It almost acted as an eraser, which believe me, I needed occasionally throughout this project.

chalkpaint

Once the dark wax dried, I accented the trim around the drawers and the spiraled corners with gilding wax by Cire A Dorer (found at the same store that sold the Annie Sloan paint, so I guess it's as easy to find as AS paint?).  It was pretty neat because I literally dabbed my finger in it and just swiped it wherever I thought might look good.   It was so easy to use that I got a little carried away and started walking through the house, dabbing gold accents here and there.  I ordered new gold handles from Ebay and slapped some paint on them, not really taking care to completely paint the handles so some of the gold peeped through.

buffet

Since I'm the type that would, in addition to doing a terrible paint job, accidently spill the paint then step in it and walk through the house, I was pleasantly surprised this project turned out pretty good.  Even the hubs like it.  Heavenly Day, I think MomB may even approve. 

Nah.

My dear MomB has passed on, and although painted cherry would have NEVER been her cup of tea, at this point I think she'd want me to enjoy her furniture, however I need to, in her honor. 

How do I get myself in these situations?

How do I get myself in these situations?

Thank you, MomB.  I love it.  And you. 

Oh, Heavenly Day.

May 02, 2016 /Elizabeth
MomB, grandmother, buffet redo, painted buffet, buffet makeover, willett buffet, antique buffet
decorating
12 Comments
  • Newer
  • Older

I ABSOLUTELY LOVE HEARING YOUR COMMENTS! IT LET'S ME KNOW YOU ARE OUT THERE AND IT'S SO ENCOURAGING. THANK YOU SO MUCH FOR STOPPING BY! 

Hi! I'm Elizabeth.  I'm all about laughing and living a positive life as I strive to be the most I can be.  Come join me!

Hi! I'm Elizabeth.  I'm all about laughing and living a positive life as I strive to be the most I can be.  Come join me!

Subscribe

Sign up with your email address to receive the newest post.

We respect your privacy. Your information will never be released to third parties.  To insure delivery, please add me to your contacts.  Thank you!

Thank you!
Archive
  • April 2016
  • May 2016
  • June 2016
  • July 2016
  • August 2016
  • September 2016
  • October 2016
  • November 2016
  • December 2016
  • January 2017
  • February 2017
  • March 2017
  • April 2017
  • May 2017
  • June 2017
  • September 2017
  • October 2017
  • November 2017